Create your first worksheet
Build a whole lesson in one document, with explanation, runnable Python, multiple choice, written answers and fill in the blanks. Write it by hand, start from an AI draft, or import a Jupyter notebook.
A worksheet is a lesson your class works through from top to bottom in the browser: explanation, questions and code mixed together however you like. Most of it marks itself as students work, and the written parts come back to you organised for marking. Worksheets carry theory just as well as code, so they work for GCSE and A Level content that has nothing to do with programming.
1. Create it
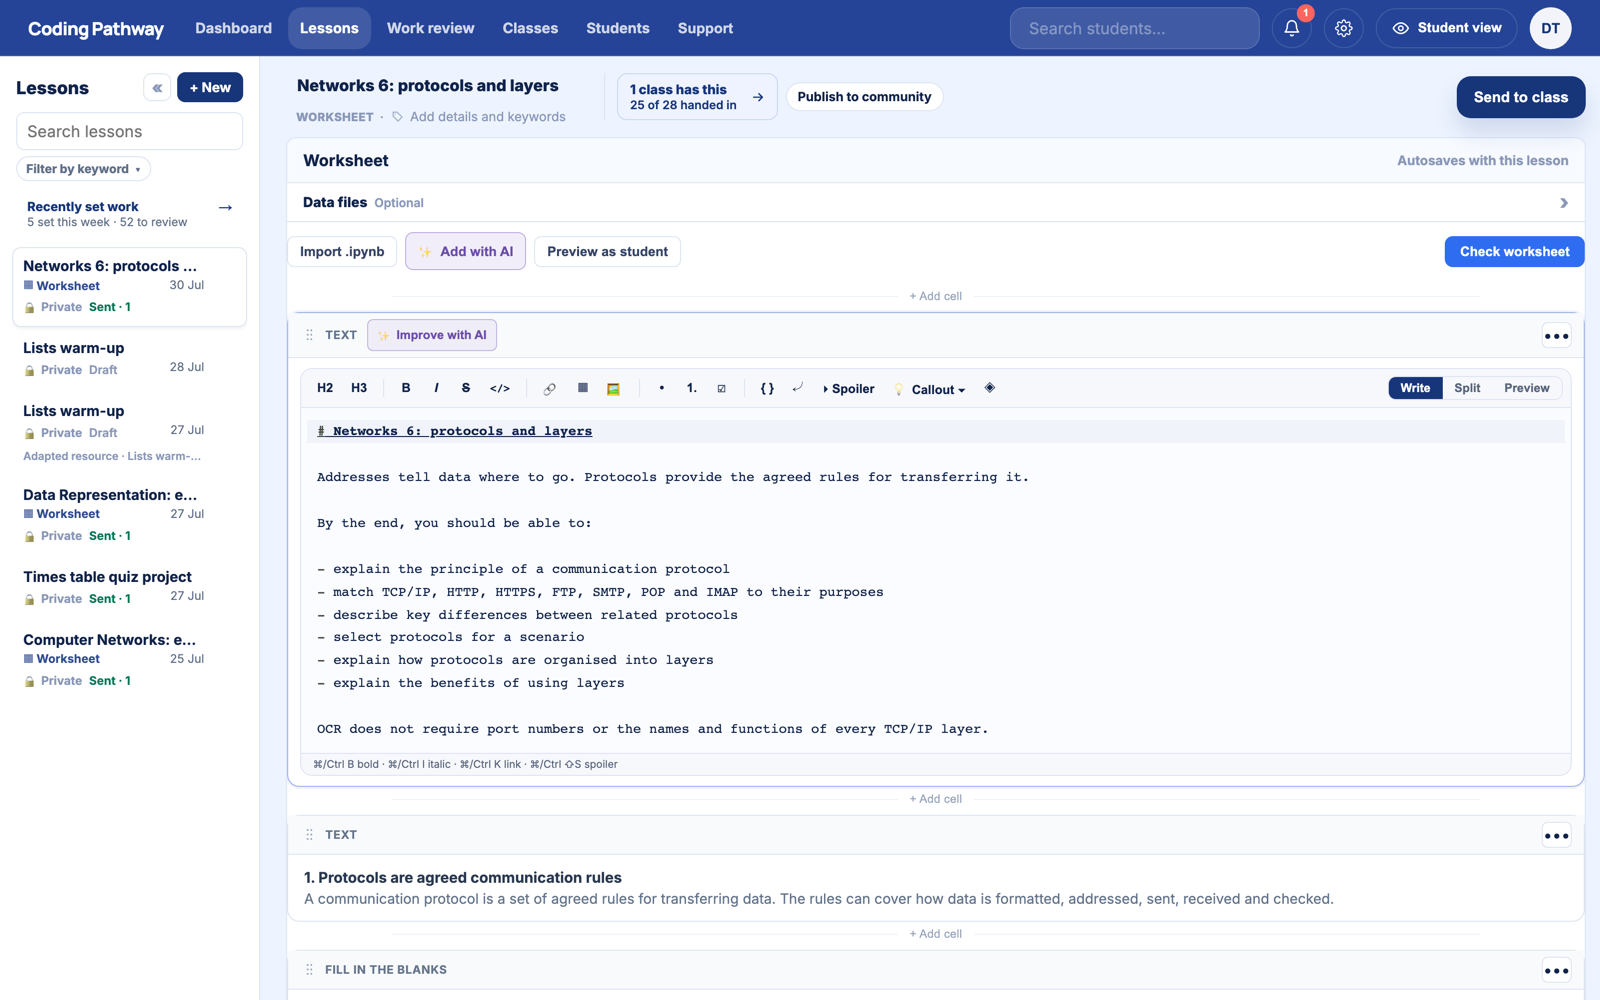
Go to Lessons, choose + New, and pick Worksheet lesson. Give it a proper title straight away; it becomes the name students see.
A worksheet is a stack of cells. Add them one at a time with + Add cell:
- Text cells carry the teaching: explanations, worked examples, instructions. Full Markdown.
- Code cells run real Python in the browser, and every cell in the worksheet shares one Python session, so a variable defined early is still there at the end. Each code cell has a role: Run-only for a worked example students can run but not break, Practice for an open sandbox, or Checked answer for code you want marked.
- Multiple choice questions mark themselves instantly, or hold their answers for your review if you prefer.
- Written answer questions collect short or extended prose for you to mark, with AI-drafted suggestions if you want them.
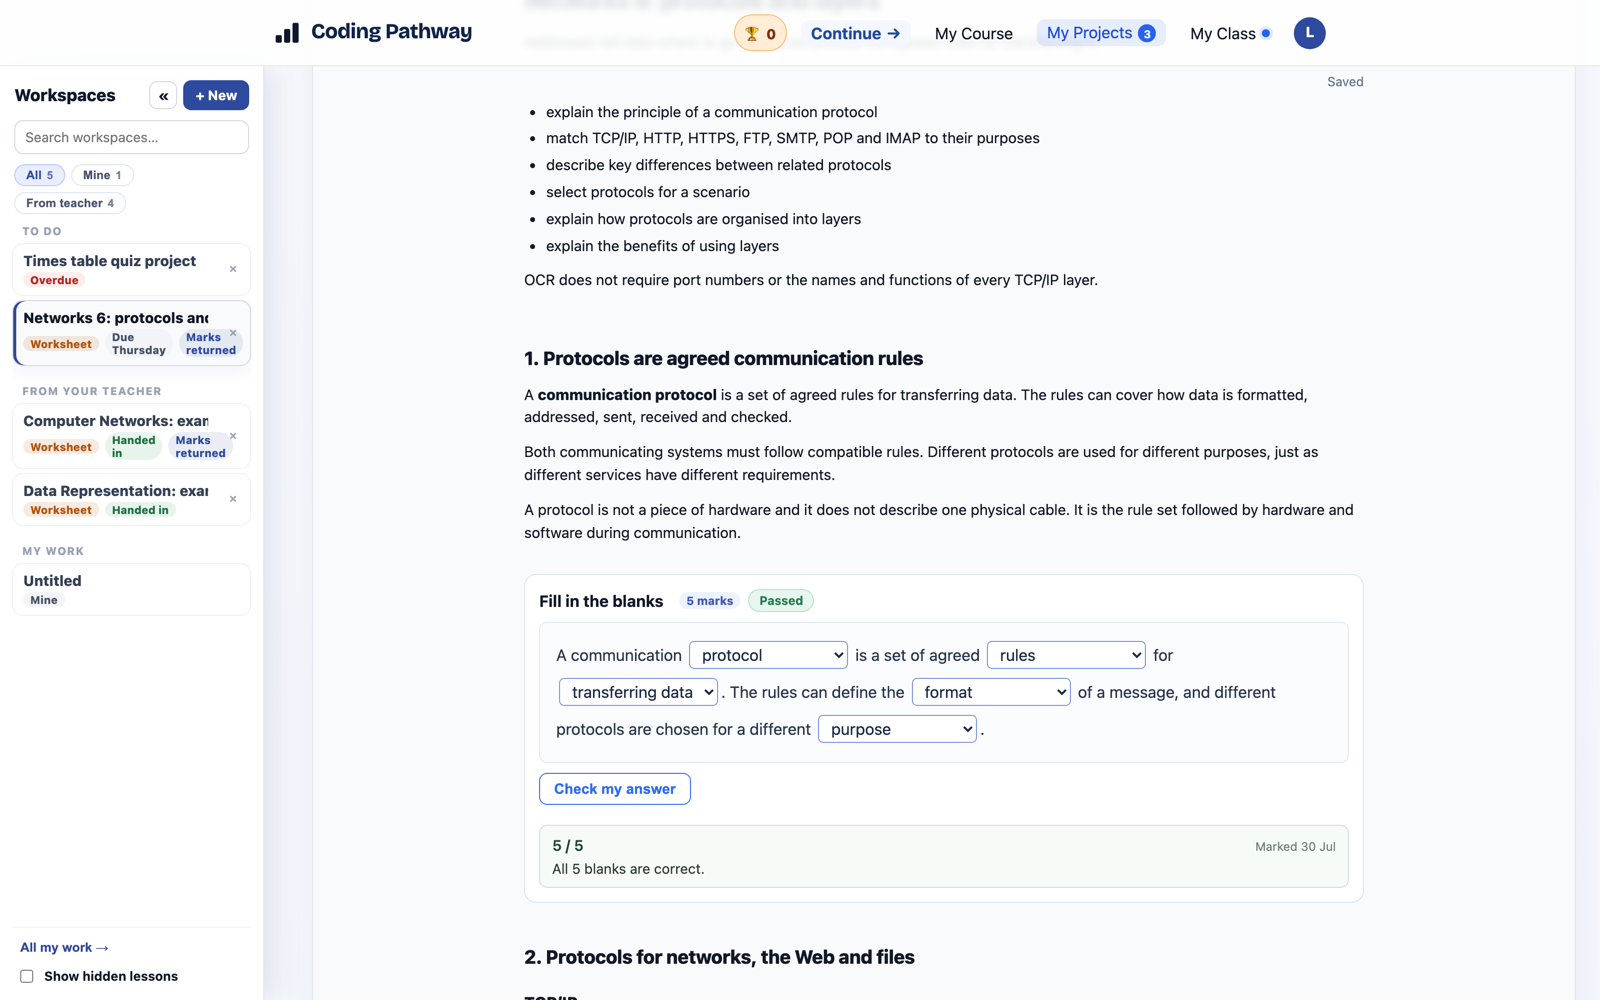
- Fill in the blanks works for both prose and code: sentence completion with a shared answer bank of dropdown options, or a Python template with typed gaps that compiles and runs against your checks.
2. Set up the marking
For a Checked answer code cell, open its settings and write the Reference solution, then run it. The worksheet suggests checks based on what your solution actually does: a variable's final value, printed output, a Python feature used. Tick the ones you want and choose Apply selected. Students never see your solution; they see whether their own code passes your checks.
For Written answer questions, fill in the marking guidance: how you would award the marks, in your own words. This matters more than it looks, because it is what the marking suggestions are drafted against later. A question without marking guidance is left for you to mark entirely by hand.
Give any question a mark value and the worksheet gains a marks total, question by question.
3. Or start from a draft
Two shortcuts, both staff-only:
- Draft with AI takes a description of the lesson you want and proposes a complete worksheet. You review the proposal cell by cell, tick exactly the ones you want, and nothing changes until you apply it. From there, Improve with AI on any cell rewrites, extends or builds a follow-up.
- Import .ipynb converts a Jupyter notebook: text and code cells arrive ready to edit, and you add the question types on top.
Either way you are editing a normal worksheet afterwards, and students never see AI anywhere on Coding Pathway.
4. Check it and send it
Preview as student shows exactly what the class will get. Check worksheet looks over the whole document for anything unfinished. Drafts save however incomplete they are; the full check runs when you send, so a half-built question can never reach a class.
Then Send to class, with a due date and hand-in if you want them. Each student gets their own copy, progress appears against your class as they work, and everything they answer feeds the marking tools.
When the work comes back in, see marking a Worksheet for a whole class. Or skip the writing entirely and start from a community resource.